Turnips thrive in places where other vegetables can't grow, and they've been making a comeback recently in everything from home recipes to fine dining. Much like other vegetables, there are many ways to store turnips, including in the in the fridge, in the freezer, or out in the open — but just like many root vegetables, turnips rot much more quickly if the green leaves are left attached, or if they are chopped before being stored.
Steps
Method 一: Method 1 of 4:
Storing Turnip Greens

1 Chop the turnip greens off of the root close to the base of the leaves. Storing turnips with the greens attached makes them rot a lot faster than if the greens are removed. When removing turnip leaves, cut as close to the bottom of the leaf, where it comes out from the turnip, as possible. Turnip greens are good to keep as they can be eaten on their own, added to a salad, or included as an ingredient in veggie broth.

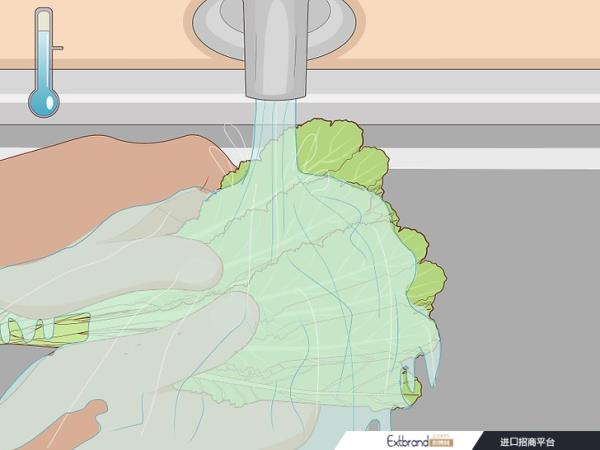
2 Wash the turnip greens under cold water to remove dirt and pesticides. Run cold water over the veggie greens to get rid of excess dirt, pesticides, and any large bugs. Cut away any remaining turnip root attached to the bottom of the leaves, then shake the excess water off of the leaves. Don't use hot water as it can affect the taste and damage the texture of the turnip greens. Advertisement

3 Soak the greens in salt water for 5 minutes then wash them again. Place the turnips greens into a tub and fill it with enough water to just cover the tops. Then, add 2 tbsp (34 g) of salt and mix the solution until the salt dissolves. Let the turnip greens soak for 5 minutes to kill any small insects or germs remaining on the leaves, then rinse them under tap water to wash away the salt water. Essentially what you're doing here is creating a saline solution, which kills germs and will help to keep the greens fresh in storage. If you are avoiding salt, take care to wash the greens with cold water to completely rinse them of salt water. A saline solution is necessary to kill small organisms, but you can get rid of all the salt with a good rinse.

4 Keep the greens in sealable plastic bags in the fridge for up to 5 days. Place the greens into sealable plastic bags then place them into the vegetable crisper drawer of your fridge. You can store multiple greens in the same bag, but be careful not to overpack them or you could risk bruising the leaves. Turnip greens will last for less than a week in the fridge before they go bad, so use them quickly!

1 Sort the bruised or damaged turnips from the best ones. Sort through your turnips and find any that are bruised, cut open, or otherwise damaged. These turnips will not last very long in storage, so set them to the side and use them within the next few days. Chop up damaged turnips, cutting away the bruised or sliced portion, and use them in a stew or broth for added bitter-sweet flavor.
2 Wash the turnip roots under cold water for a few seconds to get rid of dirt. Run the turnip roots under cold water to wash it of dirt and pesticides for a few seconds. Avoid using warm or hot water as it is more easily absorbed by the turnip and can make the flesh spongy and unappetizing. Washing the turnips is not recommended if you want to keep the turnips for more than 2 weeks, but if you plan on using them within that time it helps keep them fresh. If you want turnips to last longer, store them out of the fridge in a container.

3 Place the roots in separate plastic bags wrapped in a moist cloth. Wrap the roots in a moist cloth then store them in separate plastic bags, as the rotting process is quickened if roots touch. Use plastic bags that are just large enough to hold a turnip without much extra room to maximize the freshness of your roots. Make a final check to see if there are any leaves or stems remaining on top — if there are, cut them away as close to the root as possible before storage, as leaves make turnips rot very quickly.

4 Keep the turnip roots in the crisper drawer of your fridge for up to 2 weeks. The turnips should stay fresh and ready to cook for up to 2 weeks if stored separately in the fridge. Keep them in the vegetable crisper drawer to keep them in a more humid environment, which maintains the root's flesh and texture more effectively. If your fridge has the capability, turn the humidity up to 95 percent and the temperature to 32–40 °F (0–4 °C) to create conditions that let turnips last up to 6 months!

1 Fill a large plastic container halfway with damp sand or sawdust. The container should be large enough to comfortably house all of your turnips with plenty of extra room. Fill it halfway with moist sand or sawdust, as this provides an insulating material for the turnip roots. Peat moss is another good choice for an insulating material, but fresh, untreated moss could house small bugs that could damage your turnips.
2 Place the roots upside-down into the insulating material so they don't touch. Do not wash the roots before putting them into the container, as this speeds up the rotting process. Place the roots in the insulating material top-down, covering them completely. Keep them 2 in (5.1 cm) away from each other, and repeat until the whole container is full. It's important to keep the turnip roots separated by a 2 in (5.1 cm) layer of insulating material as turnips rot much quicker if they touch.

3 Store the turnips in a cool, well-ventilated area for up to 6 months. Place the lid loosely on top of the container to allow for air to circulate in and out. Then, take the container to a dark, cool, and well-ventilated area, such as a garage or a garden shed. Keep the container off of the ground to prevent contamination from small bugs. They should last for up to 6 months if kept in these conditions, especially in the fall and winter seasons as the air is naturally colder and windier. This is a modernized version of the way medieval Europeans would keep turnips good over the wintertime, relying on their turnip stores to survive each year.

1 Wash and peel each turnip after removing the greens. Cut away the leaves of the turnip, then wash each root under cold water to get rid of pesticides and dirt that could affect the freezing process. Peel the outlet layer of skin away with your hands — you may find it easier to get a good hold on the skin if you make a very shallow incision first.

2 Cut the turnips into small cubes as you boil a pot of water. Fill a pot full of regular tap water then bring it to a rapid boil on the highest stovetop heat setting. Then, use a chef's knife to cut the turnip roots into 0.5 in (1.3 cm) cubes and set them to the side. An easy way to do this is to make cuts every .5 in (1.3 cm) lengthwise, turn the turnip 90 degrees, then cut away cubes at a right angle to your previous cuts every 0.5 in (1.3 cm).

3 Blanch the cubes for 2 minutes, then let them cool before draining the water. Drop the cubes into the boiling water for no more than 2 minutes to soften them up and get the turnips ready for freezing. After 2 minutes, strain out the water in the pot, and drop the cubes into cold water to quickly cool them. Drain out the cold water after about 2 more minutes. The blanching process helps to preserve the turnips as it softens the skin and moistens the roots, making them come out of the freezer soft and ready to cook.
4 Freeze the turnips in resealable containers for up to 1 year. As opposed to storing them in the fridge or out in the open, it doesn't matter if the turnips touch in the freezer. Pack the cubes into a sealable plastic container, and leave about 0.5 in (1.3 cm) of headspace to prevent freezer burn. Then, simply put the container in the freezer! The cubes can last for up to a year in the freezer if stored this way, but check on them every now and then to look for deterioration or freezer burn. You can prepare turnips in different ways. For example, roast them in a pan. Pickle them and put some beet juice in the pickled turnips. Or mash them like a potato. It is a lower carb option for a potato.